Are you looking for a way to prevent image theft in WordPress?
Image theft is a common problem that photographers deal with on a regular basis. It’s very easy for anyone to copy images and text on the internet. That’s why it’s important to protect your original work.
In this article, we will share 4 ways to prevent image theft in WordPress websites.

About Image Theft and Copyright
Copyright laws are universal and applicable around the world. The original creator automatically becomes the copyright owner of their creative work.
Even if they don’t mention it on their WordPress website, one should still assume that the content they are viewing is protected by copyright. This includes images, text, videos, logos, or any other form of content that you see on the web.
The problem is that images and text can be easily copied. Many people think that no one would notice if they stole an image and used it on their own website.
It is not only illegal but also unethical to steal other people’s work. There are many places where you can easily find royalty free and public domain images.
While it is flattering to see other people use your work in their own projects, sometimes it can be very frustrating to see a blatant disregard for your rights.
There is no way to completely stop people from stealing your images, but there are plenty of ways to discourage and prevent image theft on a WordPress website.
Here are the 4 most common ways to protect your images in WordPress.
1. Disable Right Click
Stealing images from your website is easy because a user can simply right-click and select ‘save image as’ to download them. You can disable right-click on your website and make it more difficult for an average user to steal your image.
Here are two plugins that you can use to disable right-click on images in WordPress.
Envira Gallery is the best WordPress gallery plugin in the market. Apart from helping you create beautiful image galleries, Envira comes with tons of other features as well. One of these features is image protection.
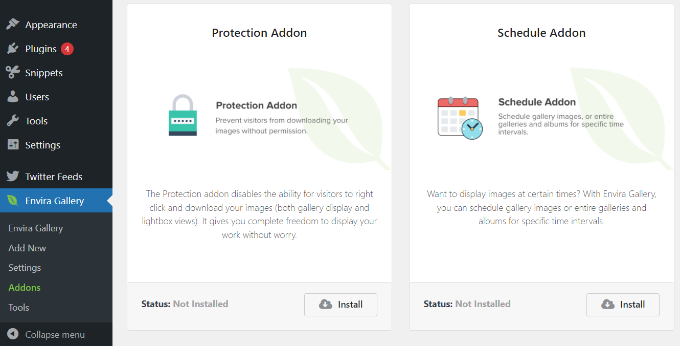
Simply go to Envira Gallery » Addons from your WordPress admin panel. Next, navigate to the ‘Protection’ addon and then install and activate it.
Now create a new image gallery with Envira Gallery. If this is your first time, then take a look at how to easily create responsive image galleries in WordPress with Envira Gallery.
When creating your gallery, click on the ‘Misc’ tab and scroll down to the Image Protection Settings. You will find the option to Enable Image Protection. Go ahead and check this option and save your gallery.
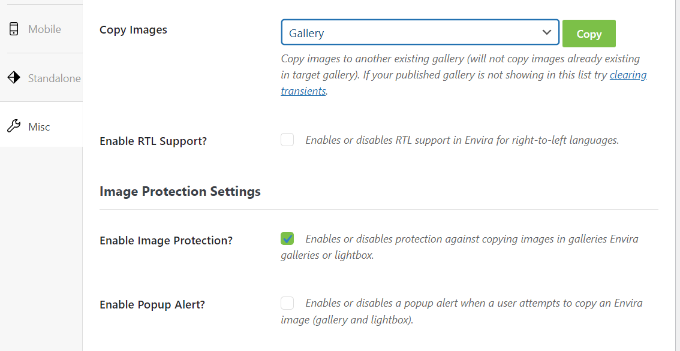
There is also an option to enable a popup alert that will appear when a user attempts to copy the image.
You can now add this image gallery anywhere on your WordPress site. It will automatically disable right-click on images.
WP Content Copy Protection is a free WordPress and it allows you to disable right-click on your WordPress site.
By default, the plugin will disable right-click on your entire website. However, you can disable protection on selected pages, posts, and categories.
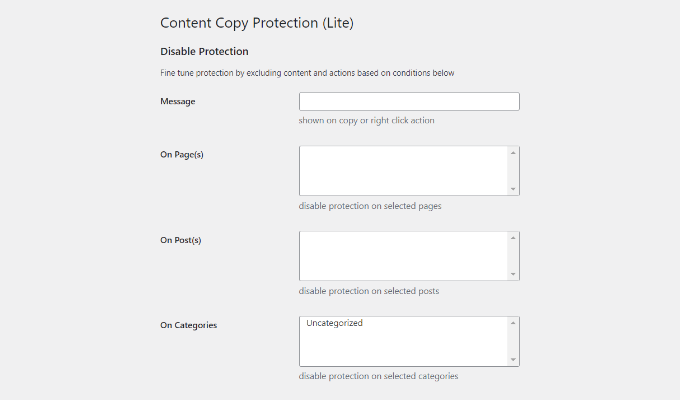
You can also control protection settings for registered users and admin users. There is also an option to show a message when a user tries to right-click an image.
2. Use Watermark on Your WordPress Images
Watermarks seem to be working great for many stock photography websites. The obvious downside is that your photographs or images might not look the best.
However, you can add watermarks tastefully. The goal is to keep the aesthetic appeal of your images while still discouraging people from stealing them.
Method 1: Using Envira Gallery
Envira Gallery comes with a Watermarking addon. You will need at least a Plus license of Envira Gallery to use this addon.
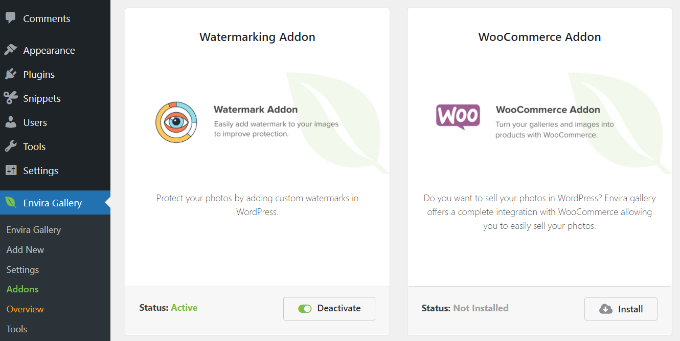
Simply install and activate the Envira Gallery plugin. Upon activation, you need to visit Envira Gallery » Addons and then navigate to the Watermarking addon. Next, install and activate it.
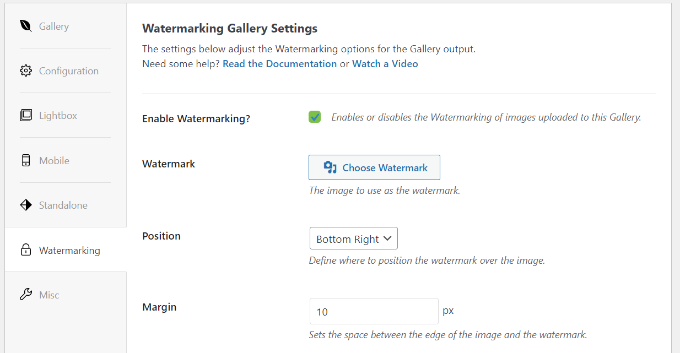
When creating a gallery or editing an existing gallery, you will notice the new ‘Watermarking’ tab in gallery settings.
You can click the checkbox for the ‘Enabled Watermarking’ option and more options will appear. Next, upload a watermark for your images, select its position, margin, and choose whether to apply the watermark to existing images.
Method 2: Using Easy Watermark Plugin
The other option is to use the Easy Watermark plugin. Simply install and activate the Easy Watermark plugin. If you need help, then please see our guide on how to install a WordPress plugin.
Upon activation, you can go to Tools &rquo; Easy Watermark page to configure the plugin settings.
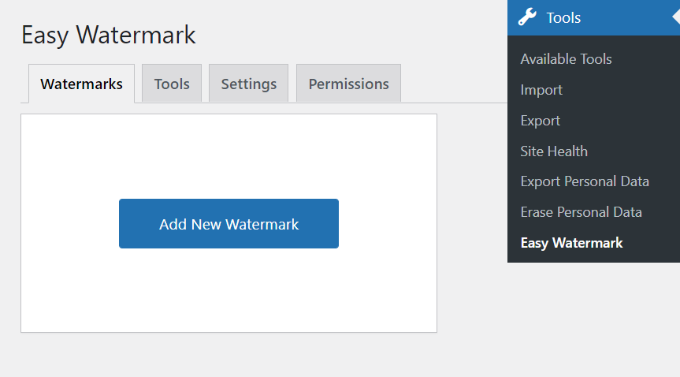
Next, go ahead and click the ‘Add New Watermark’ button and then enter the title for your watermark. After that, you can click the ‘Text’ tab and the text under the ‘Watermark’ field.
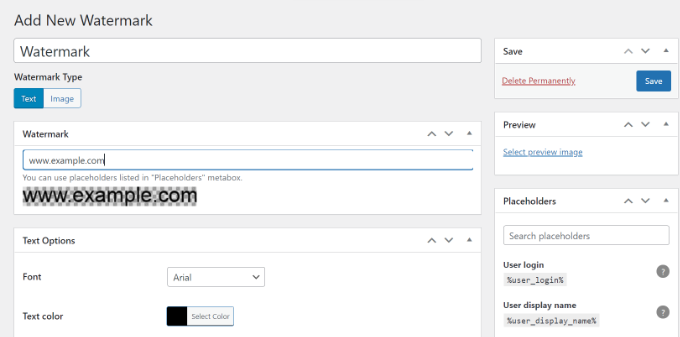
There are also options to change the text font, size, color, angle, and opacity. Besides that, you can also edit the text’s alignment and set up applying rules.
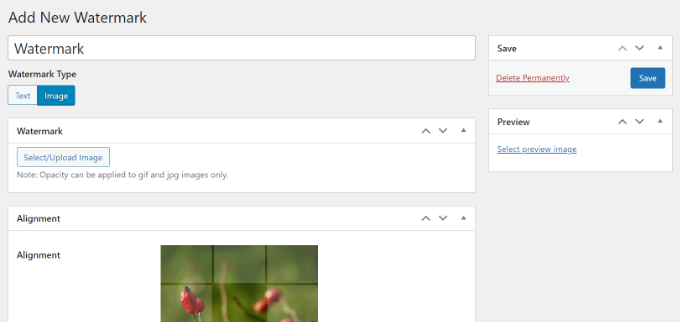
If you click the ‘Image’ tab, then you can upload an image for your watermark. When you’re done, simply click the ‘Save’ button and your watermark will appear on your images.
For detailed instructions, take a look at our guide on how to automatically add watermark to images in WordPress.
3. Disable Hotlinking of Images in WordPress
Another common way to steal images from websites is by loading them from the original source. The image will load from your servers and will be displayed on third-party websites without your permission.
This also increases your server load and bandwidth usage.
Here is how you can disable the hotlinking of images from your WordPress site.
Simply add this code to the .htaccess file in your WordPress site’s root directory.
#disable hotlinking of images with forbidden or custom image option RewriteEngine on RewriteCond %{HTTP_REFERER} !^$ RewriteCond %{HTTP_REFERER} !^http(s)?://(www.)?wpbeginner.com [NC] RewriteCond %{HTTP_REFERER} !^http(s)?://(www.)?google.com [NC] RewriteRule .(jpg|jpeg|png|gif)$ – [NC,F,L]
Don’t forget to replace wpbeginner.com with your own domain name.
This code blocks hotlinking while still allowing images to be viewed in search results and on your website.
Can’t find the .htaccess file? Refer to our tutorial on how to find the .htaccess file in WordPress.
4. Add Copyright Notices on Your WordPress Site
Adding a copyright notice to your website can also discourage people from stealing images. You can simply add a copyright notice to your theme’s footer file in plain text or HTML like this:
<p>© 2009-2016 WPbeginner.com</p>
The downside of this is that you will have to edit this code each year. A better approach is to add a dynamic copyright notice in WordPress. Simply add this code to your theme’s functions.php file or a site-specific plugin.
function wpb_copyright() { global $wpdb; $copyright_dates = $wpdb->get_results(" SELECT YEAR(min(post_date_gmt)) AS firstdate, YEAR(max(post_date_gmt)) AS lastdate FROM $wpdb->posts WHERE post_status = 'publish' "); $output = ''; if($copyright_dates) { $copyright = "© " . $copyright_dates[0]->firstdate; if($copyright_dates[0]->firstdate != $copyright_dates[0]->lastdate) { $copyright .= '-' . $copyright_dates[0]->lastdate; } $output = $copyright; } return $output; } add_shortcode('copyright','wpb_copyright'); add_filter('widget_text', 'do_shortcode');
This code finds the date of the first post you published on your blog and the last date you published anything. After that, it outputs a dynamic copyright notice.
You will need to add the shortcode [copyright] to any post, page, or text widget on your site to display a copyright notice. You can also use this code in your theme’s footer.
<?php echo wpb_copyright(); ?>

Now, if you’re not sure whether your pictures are stolen, then here’s how you can find out.
How to Check if a Photo is Stolen
The easiest way to see if a picture is stolen is by using Google Images. There are many other premium tools that you can use, but Google is free to use and quickly shows if someone else is using your images.
To start, simply visit the Google Images website and then click the camera icon.

After that, you can upload your image or paste the image URL in Google Images.
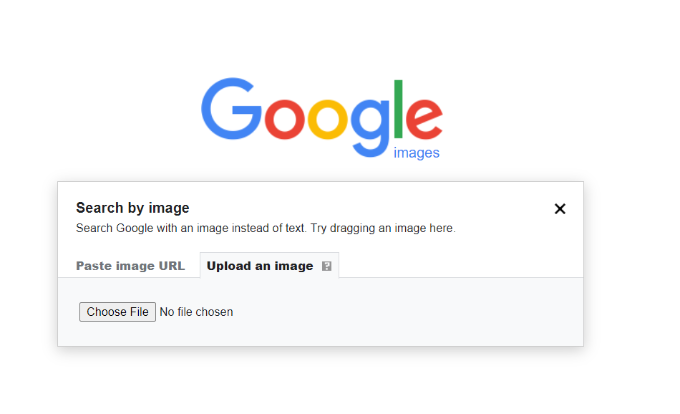
Google will now show details about the image, possible related searches, and some visually similar images.
However, if you scroll down, you’ll see the ‘Pages that include matching images’ section. This is where you can see any website that might be using your photo without your consent.

Once you’ve figured out who has stolen your images, you can reach out to them and request them to give you proper mention for your work. You can also contact Google directly and submit a takedown notice.
We hope this article helped you protect your images and prevent image theft in WordPress. You may also want to see our guide on how to fix most common image issues in WordPress.
If you liked this article, then please subscribe to our YouTube Channel for WordPress video tutorials. You can also find us on Twitter and Facebook.
