Do you want to add a background image to your WordPress site?
Background images can make your website look more engaging and vibrant.
In this article, we will show you how to easily add a background image to your WordPress site.

Why Add a WordPress Background Image?
Adding an image to your WordPress website can make it more attractive to visitors. You can quickly grab users’ attention and engage them with your content.
It also allows you to personalize your website design according to your brand. For example, you can upload subtle photos of your products or brand mascot in the background.
Additionally, you can also add a YouTube video as full background or an image slideshow that will bring your content to life.
However, we do suggest selecting background images that are not distracting or make it hard to read the content on your WordPress blog. A background should enhance the user experience and help deliver your message to visitors.
It’s also important to choose a background image that’s mobile friendly and won’t impact your website speed. Otherwise, it will hurt your WordPress SEO.
That said, let’s look at different ways you can add a WordPress background image. We’ll cover multiple methods including the use of the WordPress theme customizer, full site editor, a plugin, theme builder, and more.
Simply click a link below to jump ahead to your preferred section:
- Add a Background Image Using Your WordPress Theme Customizer
- Add a Custom Background Image Using Full Site Editor
- Add Background Image Using WordPress Theme Builder
- Add a Custom Background Image in WordPress Using a Plugin
- Add Background Images using CSS Hero
- Add Custom Background Images Anywhere in WordPress Using CSS Code
Method 1. Add a Background Image Using Your WordPress Theme Customizer
Most popular WordPress themes come with custom background support. This feature allows you to easily set a background image, and we recommend this method if your theme supports it.
However, if your customizer menu option is missing, then your theme may have full site editing enabled. In the next section, we’ll cover how to use the full site editor to change your background image.
To use the Customizer, you need to visit the Appearance » Customize page in your WordPress admin. This will launch the WordPress theme customizer where you can change different theme settings while viewing a live preview of your website.
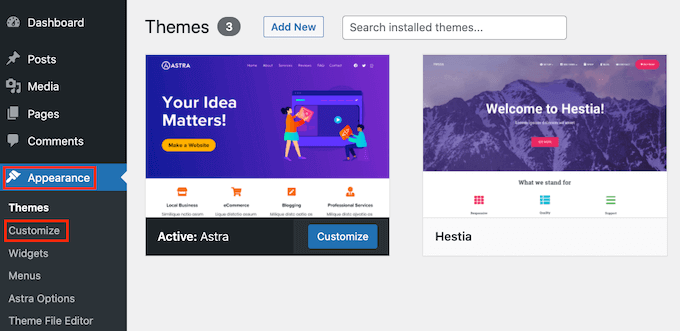
An important thing to remember is that the options you see will vary based on the WordPress theme you’re using. For this tutorial, we are using the Astra theme.
If you’re using a different theme, then you may need to look up that theme’s documentation or contact the theme developer to find out how to add a background image if you can’t find it in the customizer.
In the Astra theme’s customizer options, you need to click on ‘Global’ in the panel to the left.
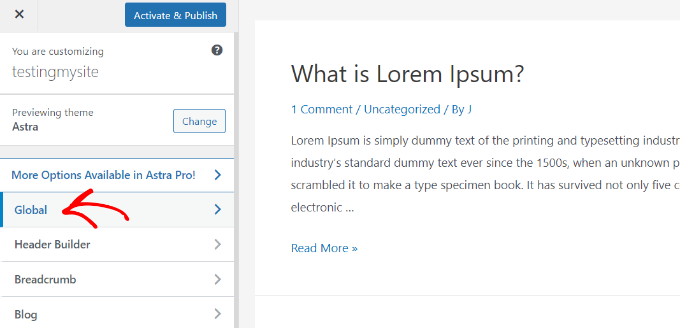
After that, you’ll see different Global options to customize your Astra theme.
Go ahead and click into the ‘Colors’ section.
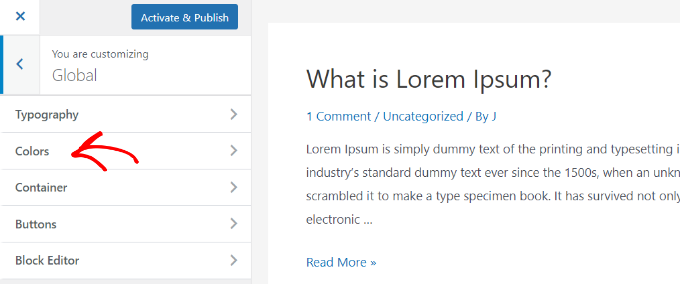
Here, you can change the theme colors, including the background color. You can also customize your links, body text, headings, borders, and more.
To add a background image, scroll down to the ‘Surface Color’ section. Then you can click on the ‘Site Background’ option and switch to the ‘Image’ tab.
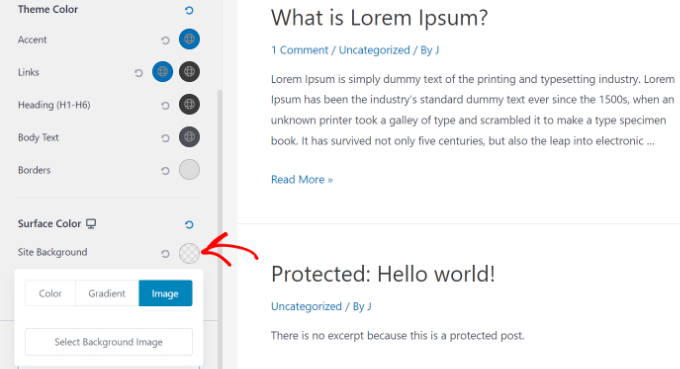
After that, simply click the ‘Select Background Image’ button.
This will bring up the WordPress media library, where you can upload an image from your computer or select one you have previously uploaded.
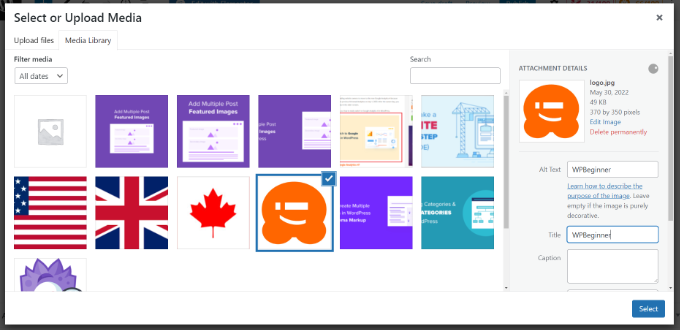
After you have chosen the image for your background, you need to click on the ‘Select’ button.
This will close the media popup, and you will see a preview of your selected background image in the theme customizer.
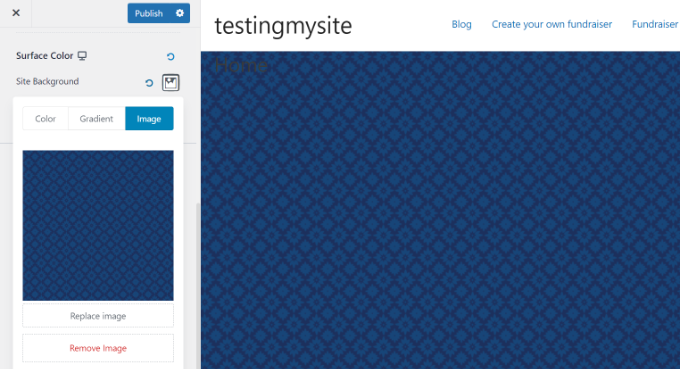
Don’t forget to click on the ‘Publish’ button at the top to store your settings.
That’s all. You have successfully added a background image to your WordPress site. Go ahead and visit your website to see it in action.
Method 2. Add a Custom Background Image Using Full Site Editor
If you’re using a block-based WordPress theme, then you can add a custom background image using the full site editor (FSE).
The full site editor allows you to edit your website design using blocks. It is just like editing a blog post or page using the WordPress block editor.
For this tutorial, we’ll use the default Twenty Twenty-Two theme. To launch the full site editor, simply go to Appearance » Editor from your WordPress dashboard.

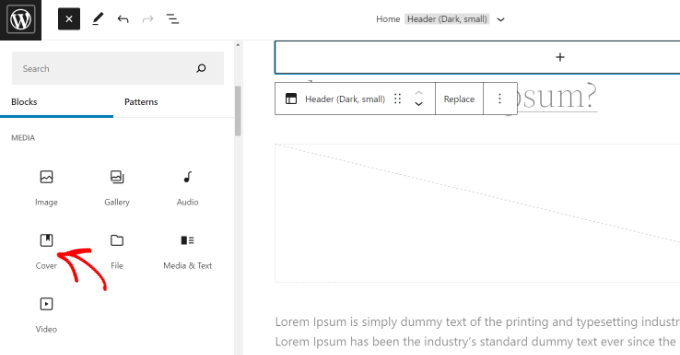
Once you’re in the full site editor, you’ll need to add a Cover block to your template to upload a background image.
Simply click the ‘+’ sign at the top and add a Cover block.
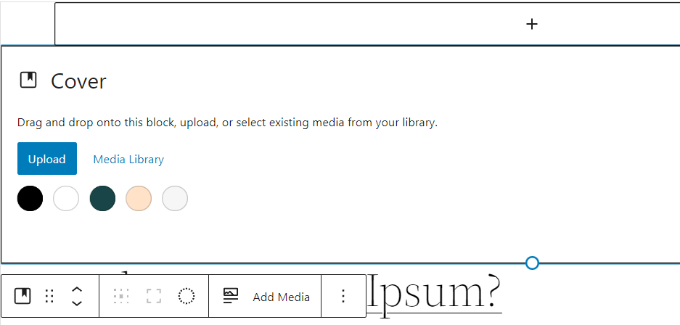
Go ahead and click ‘Upload’ or ‘Media Library’ button in the Cover block to add a background image to the block.
This will open the WordPress media uploader popup.
You can choose an image that you’d like to use as the website background.
When you have chosen the image, simply click on the ‘Select’ button.

Once the image is added to the Cover block, the next step is to set it as the background of the page.
To do so, click on the List View icon at the top (icon with 3 dashes) to open an outline view of theme elements, such as the site header and footer.
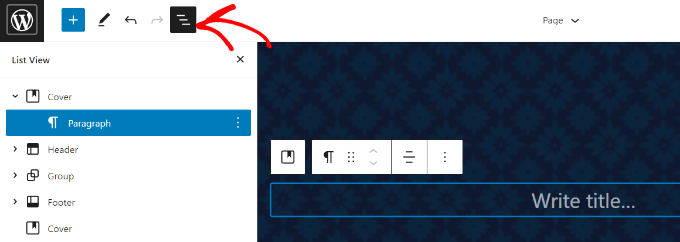
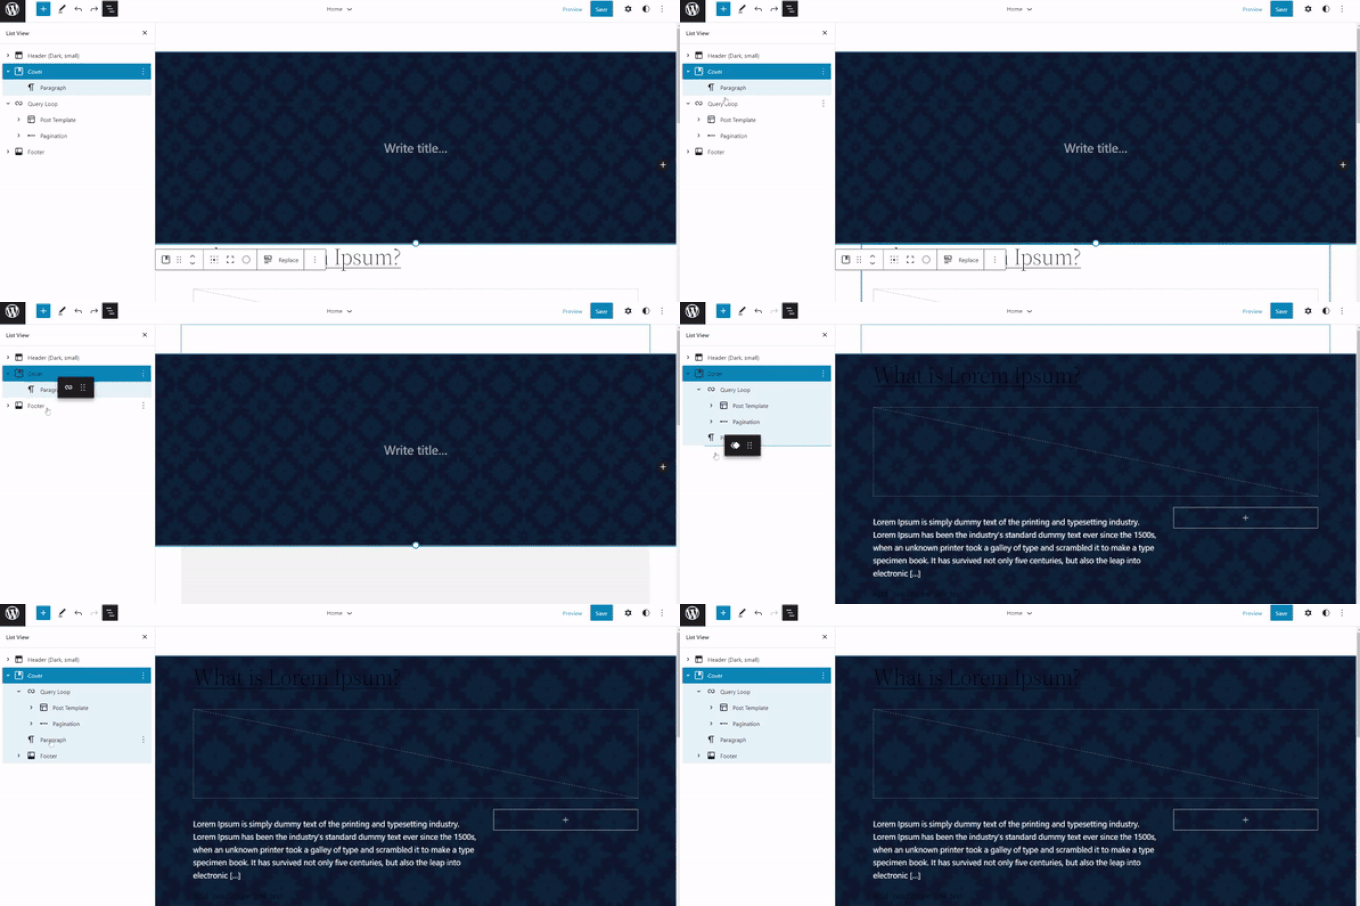
After that, simply drag and drop all the template elements under the Cover block in the list view.
When they are all under there, the Cover block’s image will show up as the site’s background.
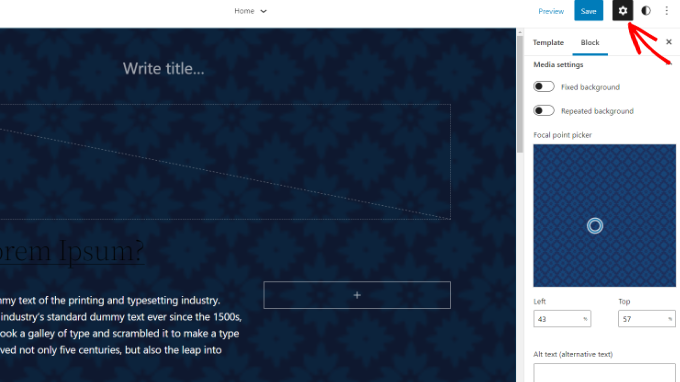
After that, you can adjust the background image by clicking into the Cover block and selecting the gear icon in the top right corner of the screen. This opens the Block settings panel.
You will find options to make the image a fixed background, repeated background, adjust its overlay, edit the color, and more.
When you’re done, don’t forget to click the ‘Save’ button.
That’s it! You’ve successfully added a background image using the full site editor.
Method 3. Add Background Image Using WordPress Theme Builder
Another way you can add custom background images to your website is by using a WordPress theme builder like SeedProd.
It is the best WordPress landing page plugin and website builder. You get drag and drop functionality to easily customize your website design without touching a single line of code.
For this tutorial, we’ll use the SeedProd Pro version because it includes the theme builder. There is also a SeedProd Lite version that you can try for free.
First, you’ll need to install and activate the SeedProd plugin. If you need help, then please see our guide on how to install a WordPress plugin.
Once the plugin is active, you’ll see the SeedProd welcome screen in your WordPress dashboard. Next, simply enter your license key and click the ‘Verify Key’ button. You can find the license key in your SeedProd account area.

Next, you’ll need to head to SeedProd » Theme Builder in your WordPress admin panel.
Go ahead and click the ‘Themes’ button at the top.
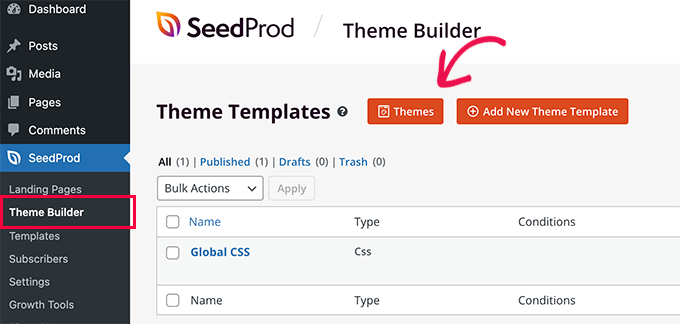
SeedProd will now offer multiple theme templates to choose from.
You can hover over any template that you’d like to use and click on it. Let’s use the ‘Starter’ theme template for this tutorial.

From here, SeedProd will generate different templates such as the homepage, single post, single page, sidebar, header, and more.
To add a background image that appears on the entire website and on all the theme templates, go ahead and click the ‘Edit Design’ option under Global CSS.
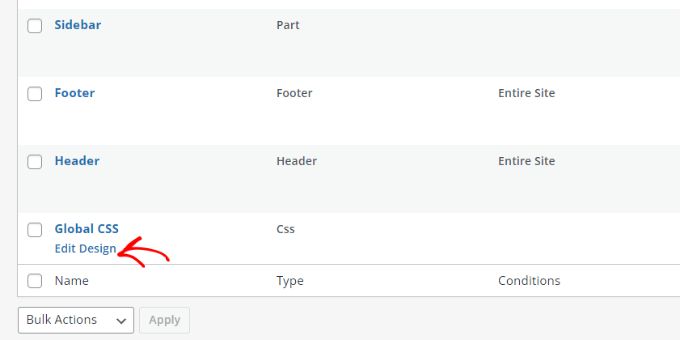
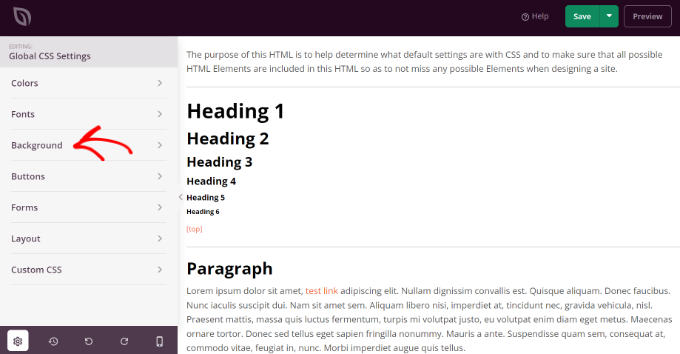
On the next screen, you’ll see global CSS settings you can change.
Simply click on the ‘Background’ option.
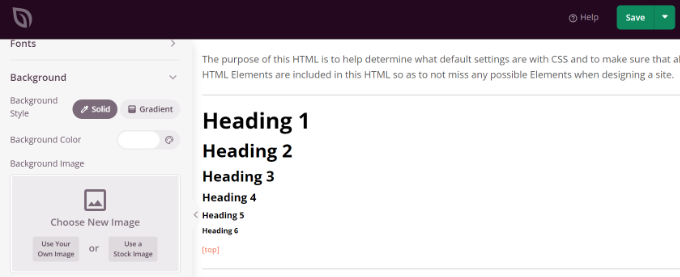
After that, you’ll see the Background Image options.
Go ahead and click the ‘Use Your Own Image’ button to upload your picture or click the ‘Use a Stock Image’ button to search for a stock image to use as your website background.
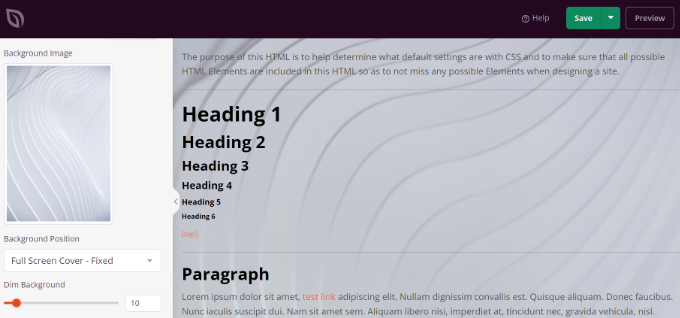
Once you’ve added a background image, the SeedProd builder will display a live preview.
The plugin also offers options to change the Background Position. You can choose whether you’d like to use the full screen cover, put it on repeat, and more.
Plus, you can edit how dark the background image should be by moving the ‘Dim Background’ slider. The higher the score, the darker the image will be.
When you’re done editing the background image, simply click the ‘Save’ button at the top and close the Global CSS Settings.
If you want to add a custom background image for different parts of your website, then you can edit those individual theme templates in SeedProd.
For more details, please see our guide on how to easily create a custom WordPress theme.
Method 4. Add a Custom Background Image in WordPress Using a Plugin
Using a WordPress plugin to add a background image is a lot more flexible than built-in WordPress options.
To begin, you need to install and activate the Full Screen Background Pro plugin. For more details, see our step-by-step guide on how to install a WordPress plugin.
This plugin will let you set a different background for any post, page, category, and more. Plus, they will automatically be full-screen and adjust themselves for mobile devices.
Upon activation, you need to visit Appearance » Fullscreen BG Image to configure the plugin settings.
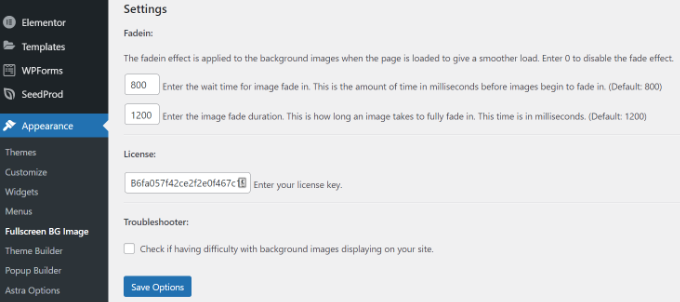
You will be asked to add your license key. You can get this information from the email you received after buying the plugin or from your account on the plugin’s website.
Next, you need to click on the ‘Save Options’ button to activate your key. You are now ready to start adding background images to your WordPress site.
Go ahead and click on the ‘Add New Image’ button on the plugin’s settings page.

You should now see the background image upload screen.
Click on the ‘Choose Image’ button to upload or select an image. As soon as you select the image, you will be able to see a live preview of the image on your screen.
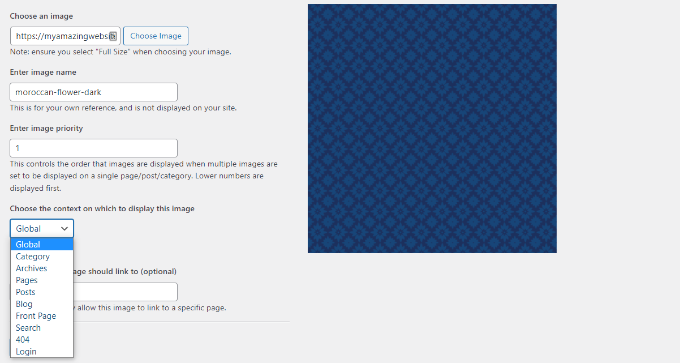
Next, you need to provide a name for this image. This name is just for you, so you can type anything here. Finally, you need to select where you want to use this as the background page.
Once you have chosen whether it will be the background for the whole site, for posts, categories, archives, or elsewhere, don’t forget to save your changes.
You can add as many images as you want to different areas of your site by visiting the Appearance » Fullscreen BG Image page and repeating this process.
If you set more than one image to be used globally or for posts, pages, and categories, then the plugin will automatically start displaying background images as a slideshow.
You can adjust the time it takes for an image to fade out and the time after which a new background image starts to fade in the plugin Settings.
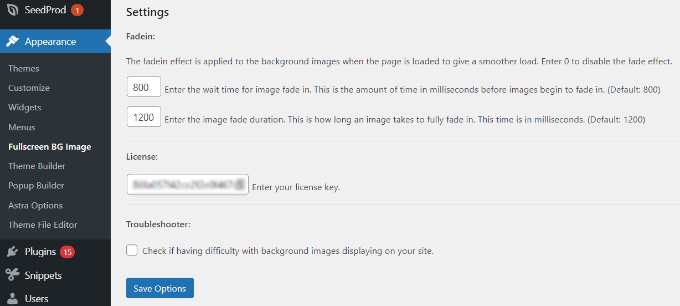
The time you enter here is in milliseconds. 1 second is 1000 milliseconds. If you want a background image to fade out after 20 seconds, then you will need to enter 20000.
Don’t forget to click on the ‘Save Options’ button to store your changes.
Background Images for Posts, Pages, and Categories
Full Screen Background Pro also allows you to set background images for single posts, pages, categories, tags, and more.
Just edit the post/page where you want to display a different background image. On the post edit screen, you will notice the new ‘Full Screen Background Image’ box below the post editor.
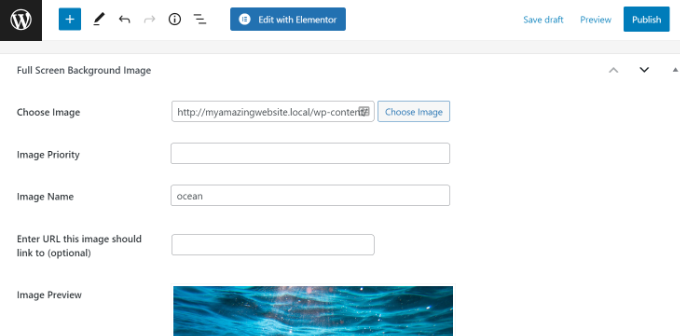
To use a background image for categories, posts, and pages, you need to visit the Appearance » Fullscreen BG Image page and then click on the ‘Add New Image’ button.
After uploading your image, you can select a category, posts, pages, archives, and other options from the ‘Choose the context on which to display this image’ dropdown menu.
Let’s say you want to show a background image for category pages. For this, simply select ‘Category’ from the dropdown menu.
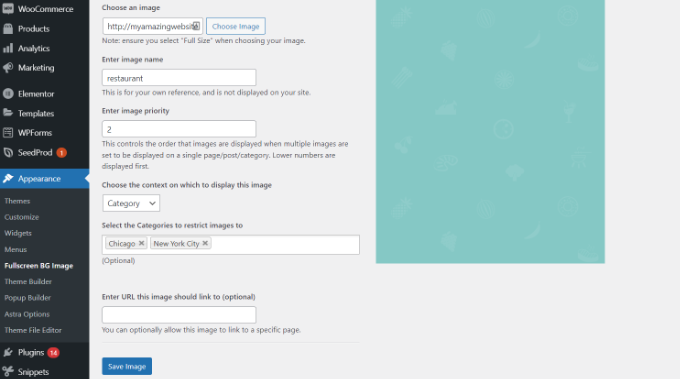
The plugin also offers an option to restrict the background image to specific categories, posts, and pages.
For example, if you want to add a custom background image for specific categories, then simply enter the category names under the ‘Select the Categories to restrict images to’ field.
Don’t forget to save your image to store your settings.
You’ve now successfully added a background image for specific posts, pages, and categories.
Method 5. Add Background Images Using CSS Hero
CSS Hero is a WordPress plugin that allows you to make any changes to your theme without touching a single line of code.
You can add background images quickly in a few simple steps. First, you need to install and activate CSS Hero. For more details, please see our guide on how to install a WordPress plugin.
Once you’ve done that, it’s time to start customizing your website. Now open up your homepage in your browser. You’ll see the ‘Customize with CSS Hero’ link in your admin bar.
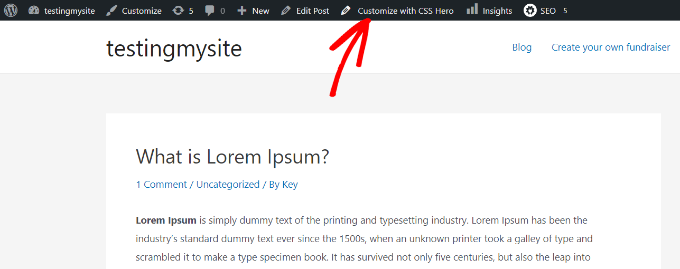
After you click that link, you’ll see the CSS Hero options open up. Hover your mouse over the area you want to add an image to.
When you click the selected area, you can see the ‘Background’ option in the left sidebar.
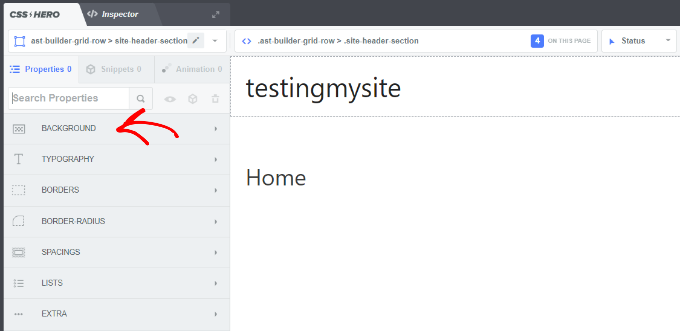
Go ahead and click ‘Background’ to see the settings for adding an image.
From there, you can click on ‘Image.’ Now, you can choose an image from Unsplash or upload your own to create your background.
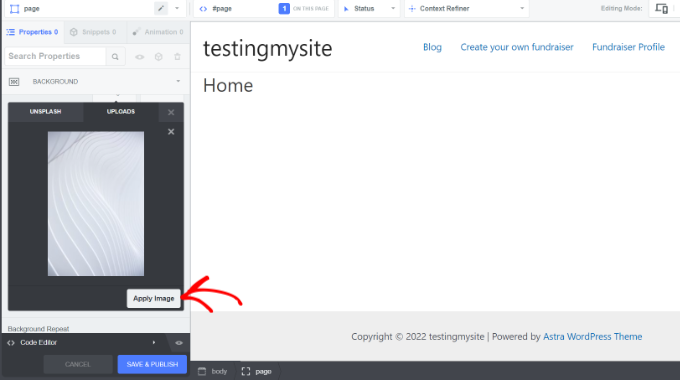
When you click on the image you want, you’ll see the ‘Apply Image’ button. Then you can choose what size you want your image to be. You can choose the large version so it will stretch across the page.
Hit ‘Save and Publish’ at the bottom to save the background image for your site.
Method 6. Add Custom Background Images Anywhere in WordPress Using CSS Code
By default, WordPress adds several CSS classes to different HTML elements throughout your WordPress site. You can easily add custom background images to individual posts, categories, authors, and other pages using these WordPress generated CSS classes.
For example, If you have a category on your website called TV, then WordPress will automatically add these CSS classes to the body tag when someone views the TV category page.
<body class="archive category category-tv category-4">
You can use the inspect tool to see exactly which CSS classes are added by WordPress to the body tag.
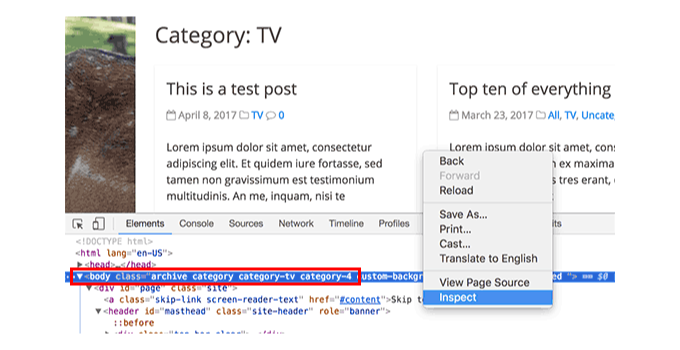
You can use either category-tv or category-4 CSS class to style just this category page differently.
Let’s add a custom background image to a category archive page. You will need to add this custom CSS to your theme.
body.category-tv { background-image: url("http://example.com/wp-content/uploads/2017/03/your-background-image.jpg"); background-position: center center; background-size: cover; background-repeat: no-repeat; background-attachment: fixed; }
Don’t forget to replace the background image URL and the category class with ones from your own site.
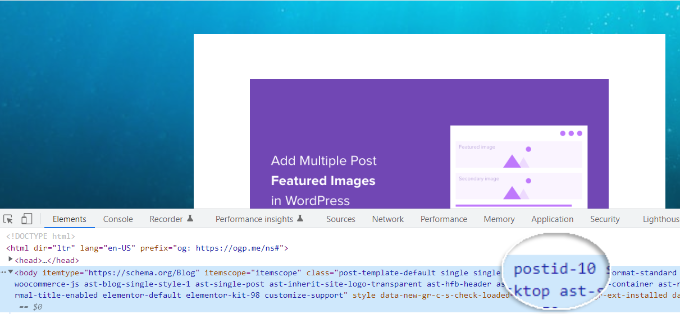
You can also add custom backgrounds to individual posts and pages. WordPress adds a CSS class with the post or page ID in the body tag. You can use the same CSS code, just replace .category-tv with the post-specific CSS class.
We hope this article helped you learn how to add a background image in WordPress. You may also want to see our guide on how to start an online store and the best website design software.
If you liked this article, then please subscribe to our YouTube Channel for WordPress video tutorials. You can also find us on Twitter and Facebook.
